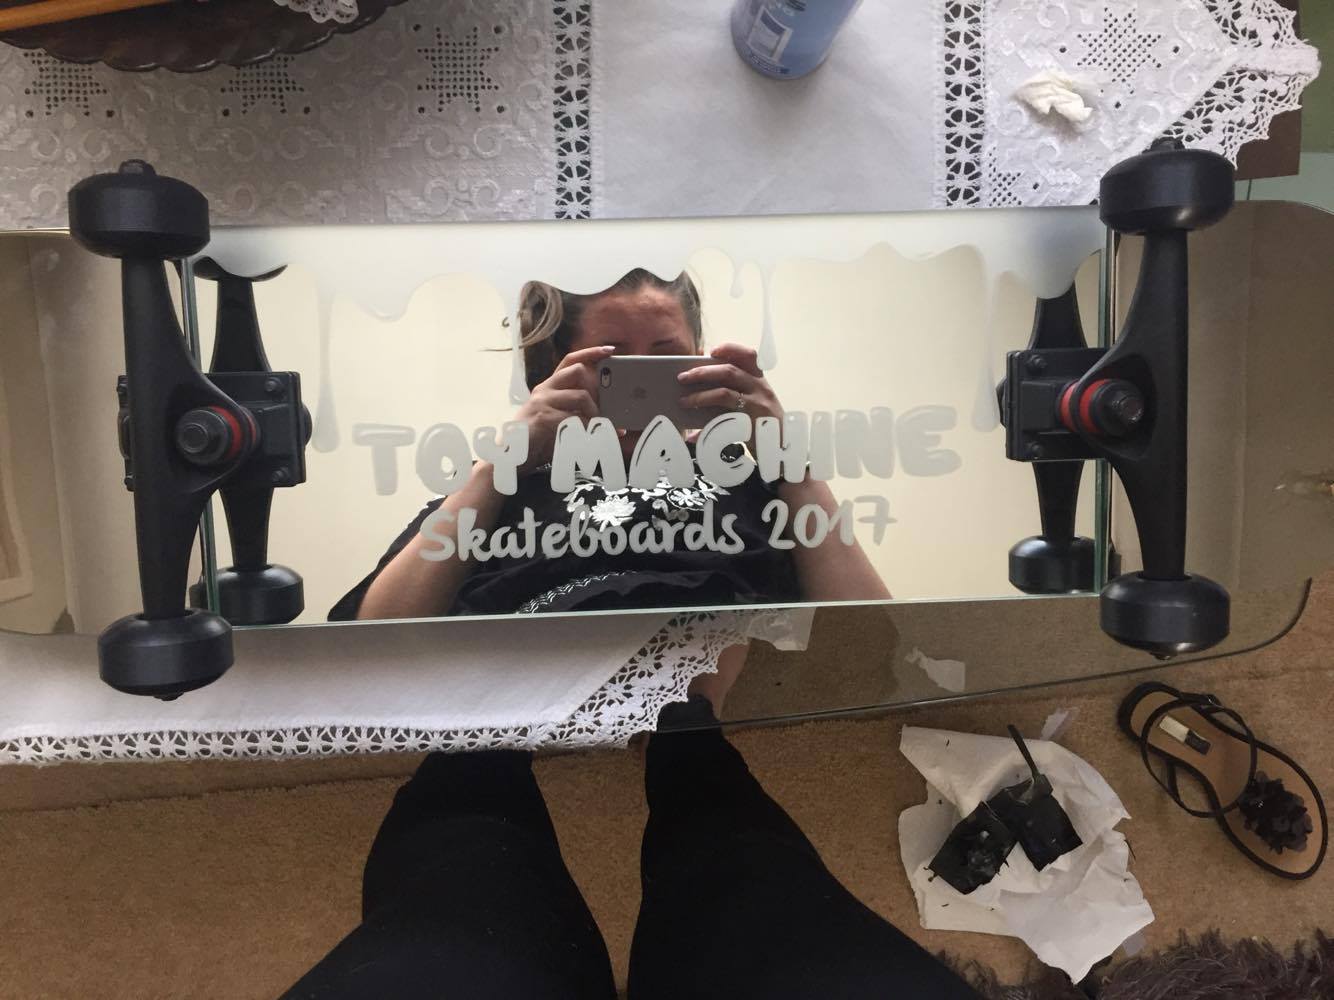
Below is the final outcome for the promotional item.
This promotional item came out exactly as planned. If I could have taken this further I would have liked to create mini skateboard decks from the summer series and put them on the keyring. However this was too expensive and impossible to produce for a one off. Overall this item fits the brief exactly as id hoped and is consistent with the other designs for this brief.
After researching exisiting promotional items and seeing how they relate to the brands itself I have decided to design something similar to my designs. I want to keep it simple yet consistent to my designs.
I have decided to go with a skateboard mirror keyring keeping the promotional item cheap to produce for the company and an item that wouldn’t break at first use.
I have decided to just use typography on this item as it is going to be very small in size and I wanted it to be legible.
I am going to keep my design simple but consistent with my other designs so will be metal to create the skateboard mirror recognition and the same typeface used on the skateboard decks in relation to those.
This is a very simple item and will just have ‘TOY MACHINE 2017’ engraved into it.
To begin designing this project I decided from my research to create some ideas.
This is what I came up with. I had to figure out what would work and what wouldn’t work from looking back at my research so after sketching I began writing things down to check up on to ensure I would get this right.
After seeing what was possible and what wasn’t I decided to go for the 3rd design with the two different views as this was going to be the cheapest and most suitable option for me. It could be made from metal to create the mirrored look like the advertisement piece and also engraved cheaply.
I uploaded my design on to Cricut design space using my previous research and began cutting.
Above is a video I took of the machine cutting my design out.
I then began weeding the vinyl that was unneeded very carefully to ensure all of the mask stayed in tacked.
I finished the weeding process and begun using the transfer tape to transfer the vinyl to the skateboard mirror without loosing any of the details. This proved difficult and had to repeat the process again checking dimensions throughout because I lost some of the design.
After I fixed the vinyl on to the skateboard I began spraying the stencil every 30 mins applying many coats to ensure from my previous experiment using the spray that the design was completely opaque.
After leaving it to dry after copious amounts of spraying I peeled off the vinyl bit my bit to ensure I didn’t catch the design and below is the final outcome.
Overall I am very happy with the final outcome of this piece. If I could develop this technique further I would have liked to use different amounts of spray to create different depths to see how far this technique can go.
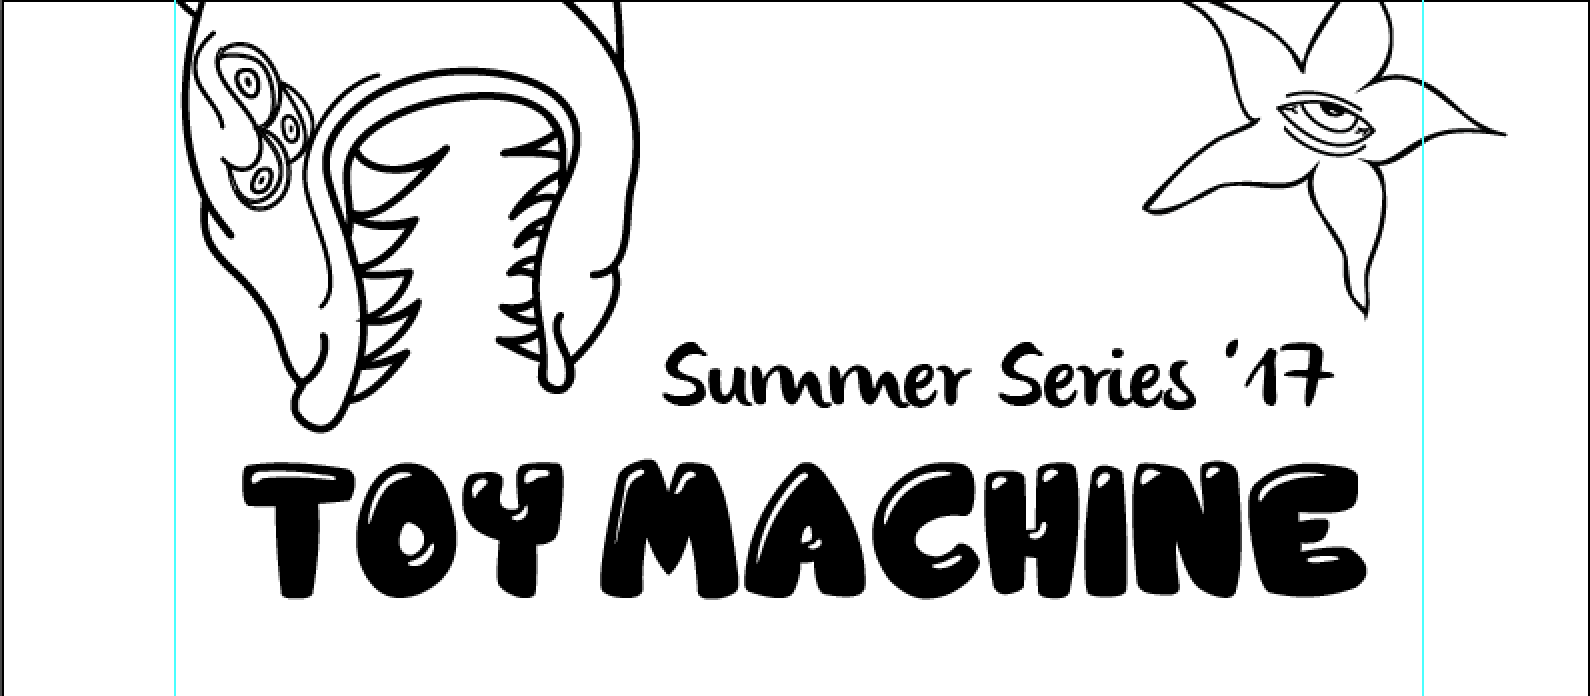
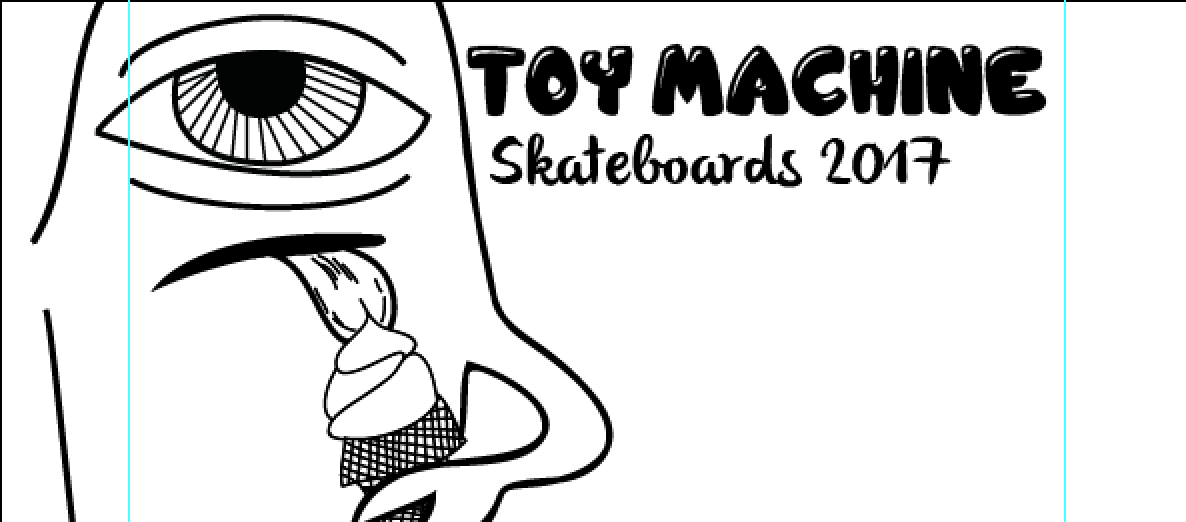
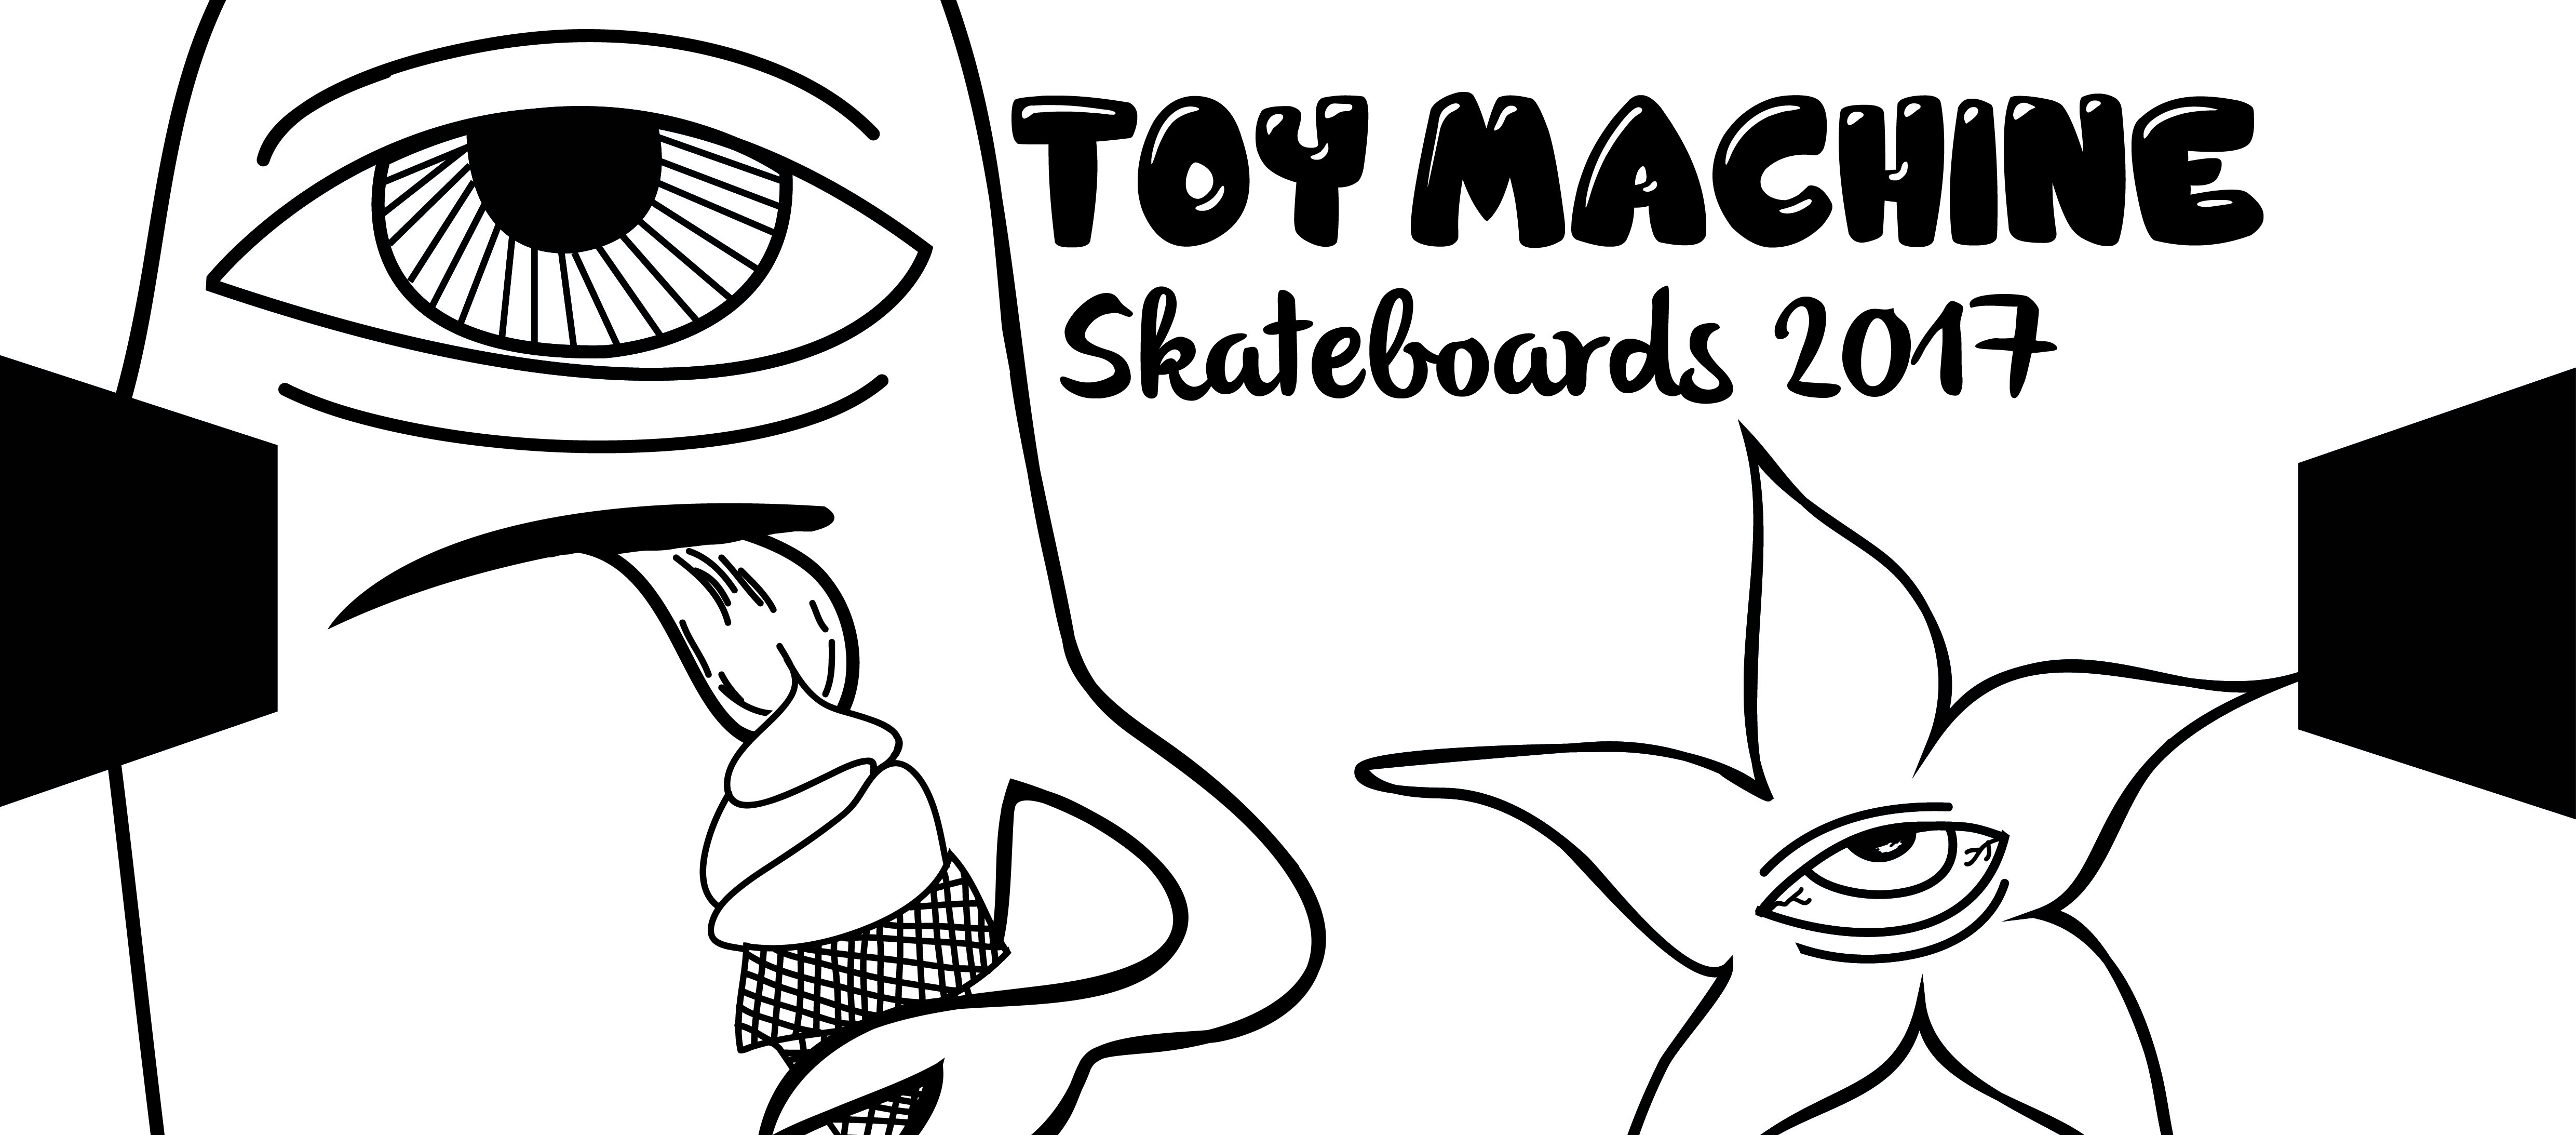
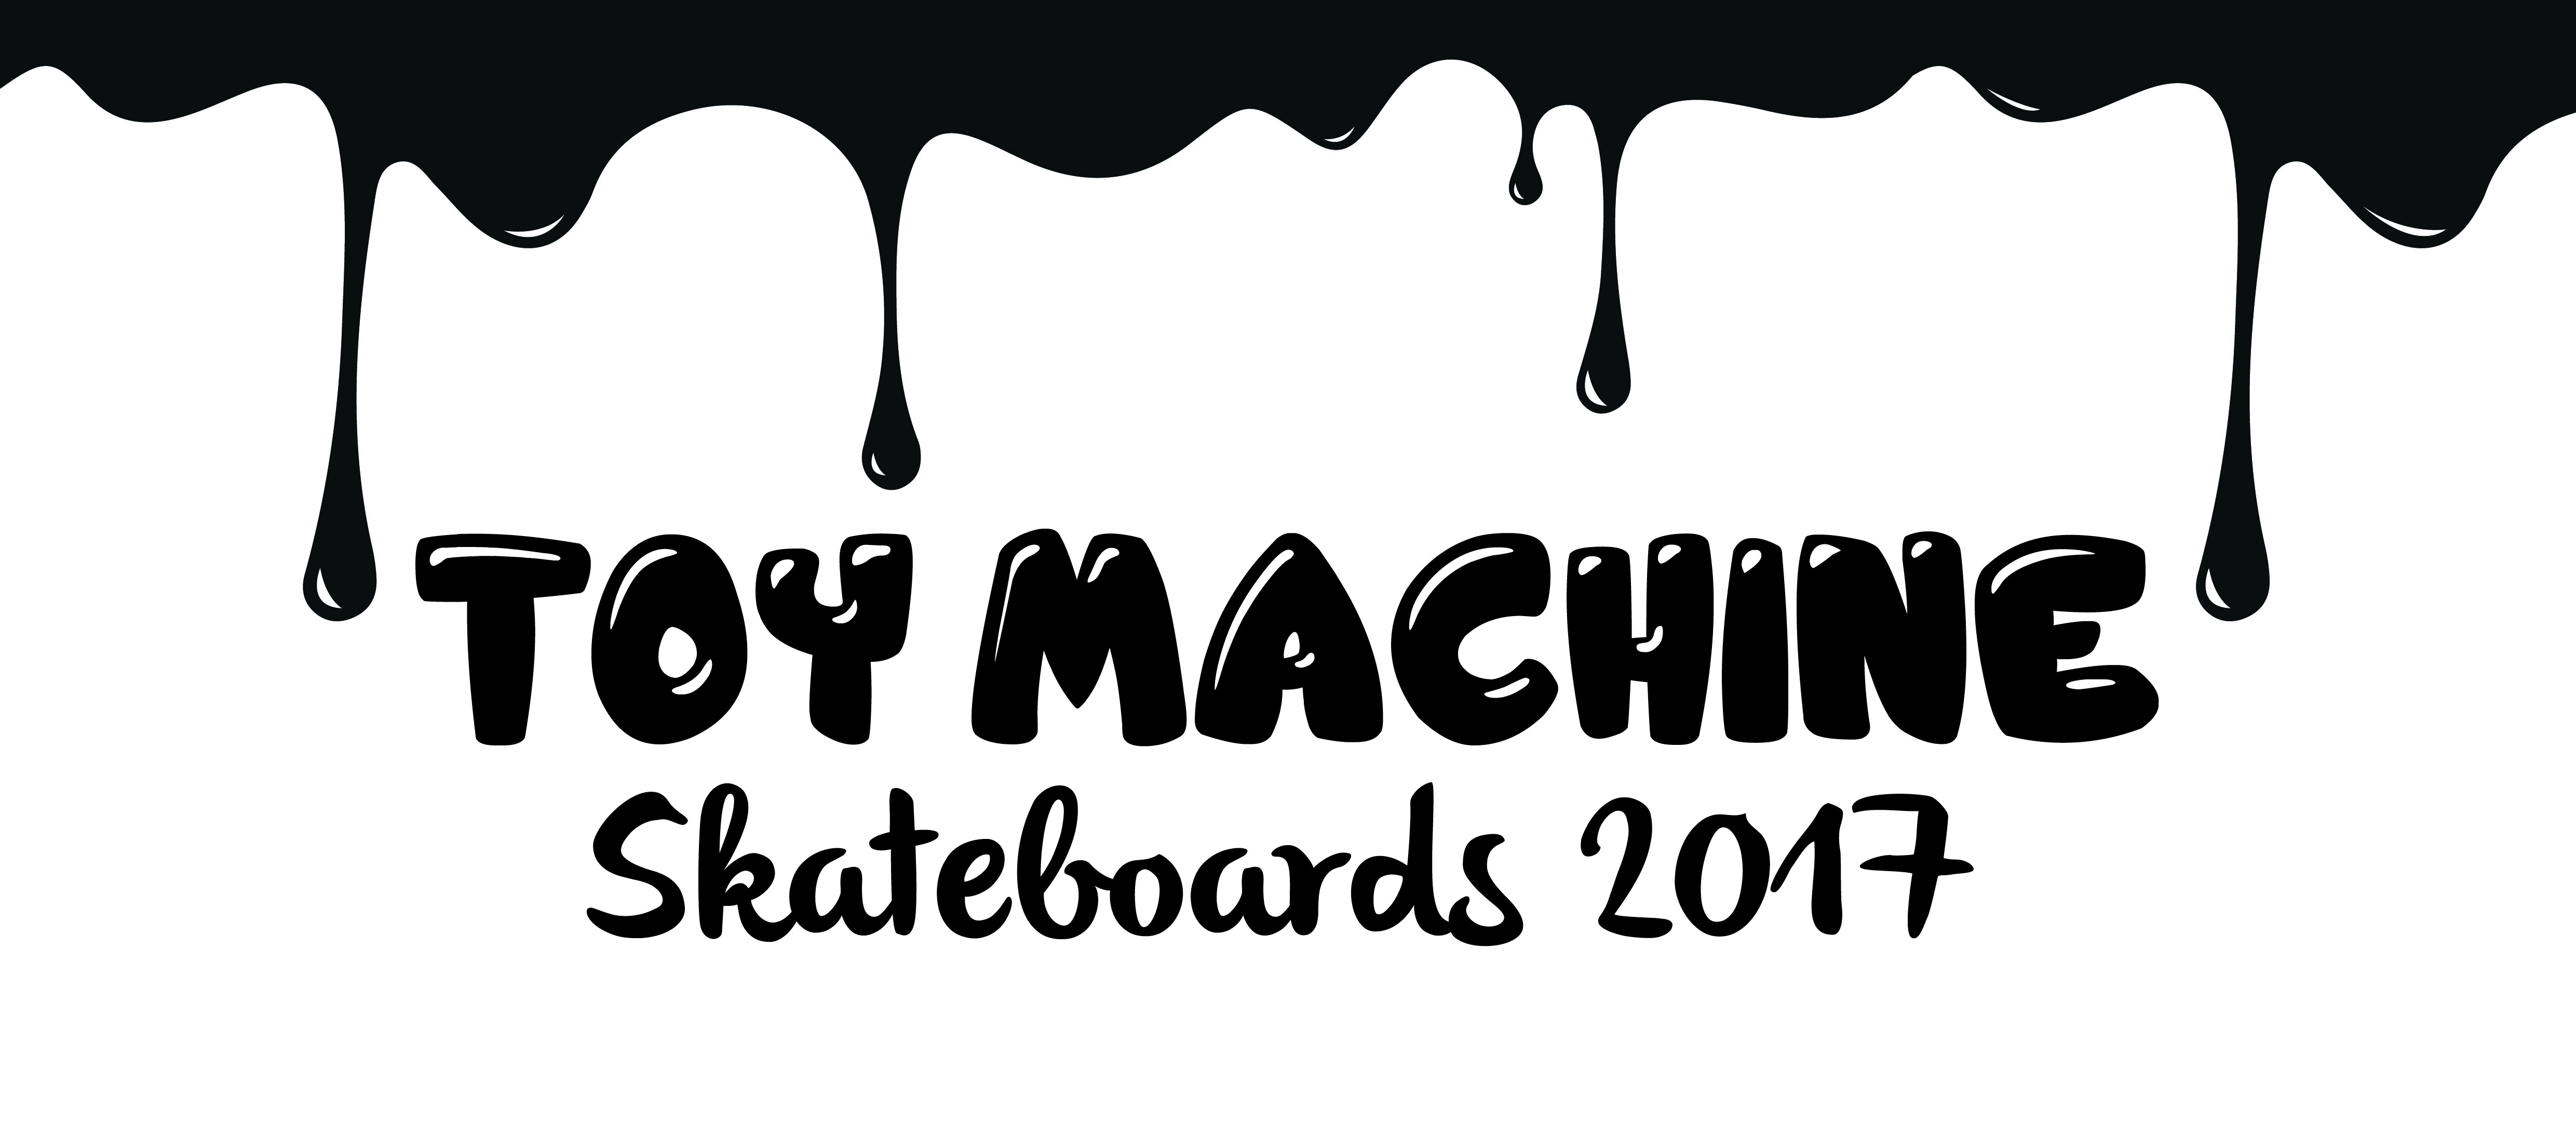
From my previous designs for the skateboard decks I wanted to ensure my designs were consistent to create recognition throughout so I began designing the cut out for the mirror skateboard based on my previous designs.
Here is what I came up with –
During the process I had to ensure I knew my design boundaries as there is trucks that cover the mirror in some places and how detailed the design might be.
I played around with different ideas based on my series of decks. Throughout I began simplifying the designs test printing throughout to see if the details would show well on the mirror and cut correctly using the Cricut cutting machine.
The designs all had to be simply black to ensure the Cricut design space would pic it up correctly so it knew exactly what I wanted cutting out and what I didn’t want cut.
After looking at each design and comparing the suitability for this particular design brief I decided that simplicity was key and to go for the last design to ensure this stood out to the audience and was not too busy or detailed. I also found that this would work best with applying the vinyl as using transfer tape is very tricky and can sometimes break detail in certain designs whereas this would not.
To cut my design I will need to know exactly how to use Cricut Design Space. I have been looking at you tube videos to explain all of the tools and information on what you can use in this particular programme. It also gives information about how to set to cut with vinyl which is what I will be using for this project.
From this I know how I will use the machine and prepare my design for cutting.
Before creating my design I feel it is important to know the programmes of Cricut and how typically the machine works. I decided to look on youtube to find this out.
Here is what I found.
From this I am going to be researching further into how I can cut vinyl using the Cricut machine and how the circuit programme works.
To begin this part of the brief I am going to be experimenting with using a Cricut cutting machine as well as testing sandblast effect spray using vinyl as a mask to create my design.
Before cutting and applying my own design I decided that It was important to test the spray to ensure it worked as well as the vinyl being a good mask. During the process I put together something small using a curly typeface to see the detail of cut to begin. I then practised ‘weeding’ which is peeling out parts of the cut vinyl which is not needed and practised transfer tape to put the weeded vinyl from the cutting board to the glass frame I was practising on.
Here was my results –
The effect was exactly was I was looking for and stands our very well. The more coats added of the spray the more defined the design looks but when designing for this process It must be a simple design to ensure no detail is lost.
The skateboard advertisement piece I am creating will be used above a line of skateboards in a store to attract customers to look at the range of skateboards by toy machine. From my research I have decided to design a mirrored skateboard with the design sprayed on in a sandblasted effect.
I will be experimenting with cutting vinyl using different machines and experimenting with sandblast effect sprays to see if they work learning different process’ throughout.
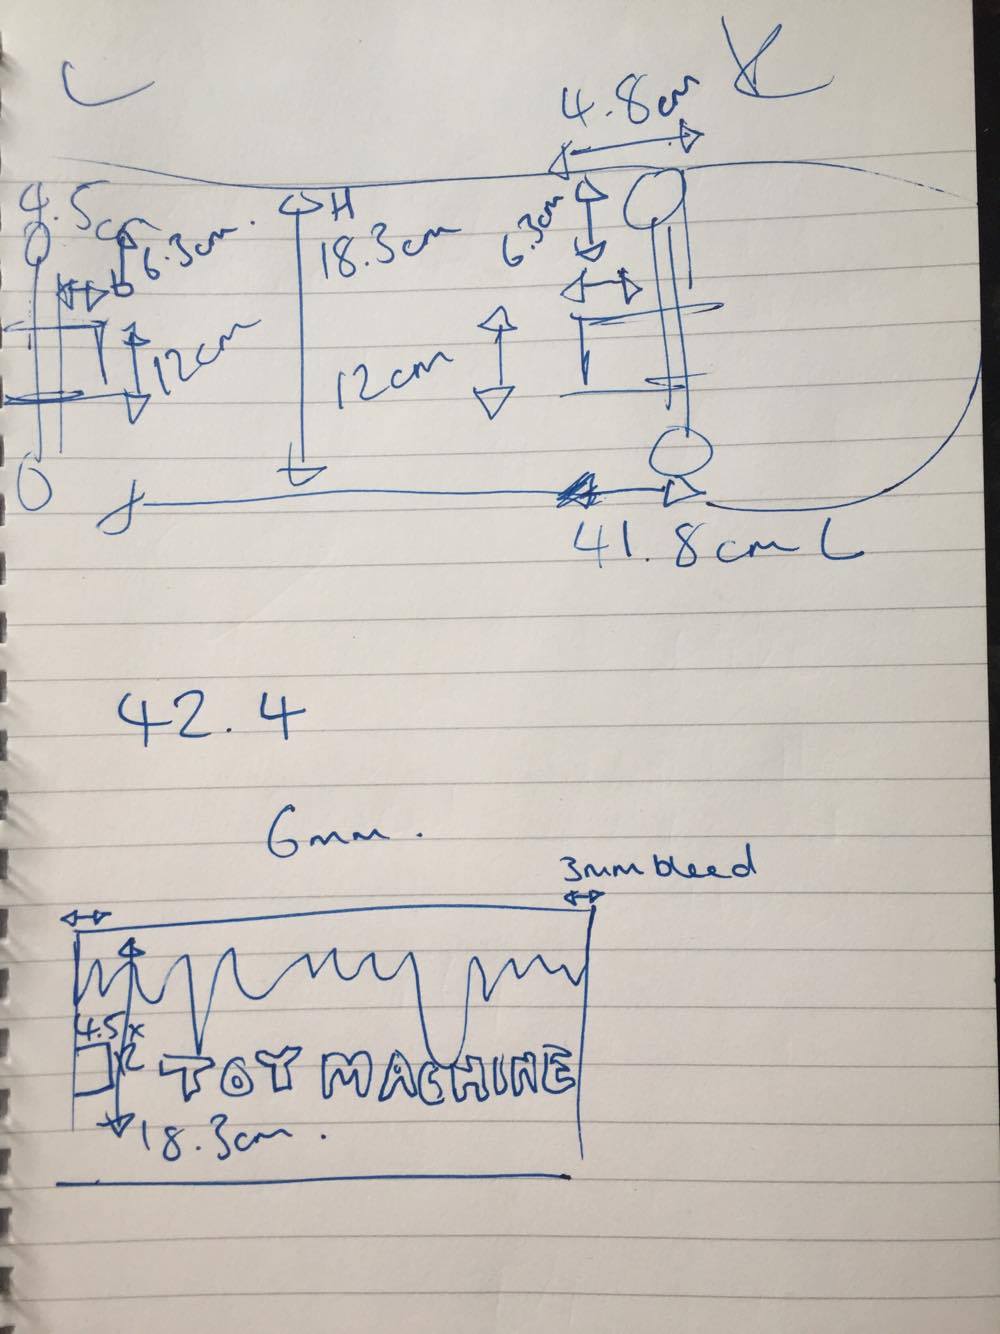
I needed to create guidelines to ensure my imagery would work on the unusual shape of a skateboard.
This is what I used to prepare my imagery for print.
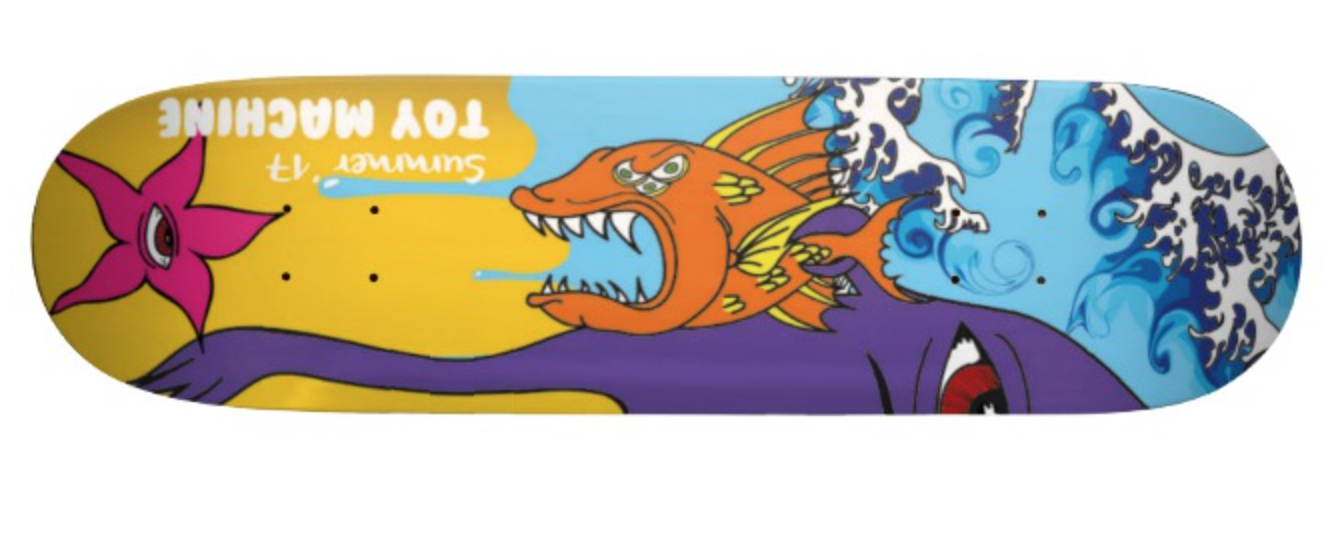
I had to move the typography up the deck slightly to ensure there was no cut offs as initially it was too low.
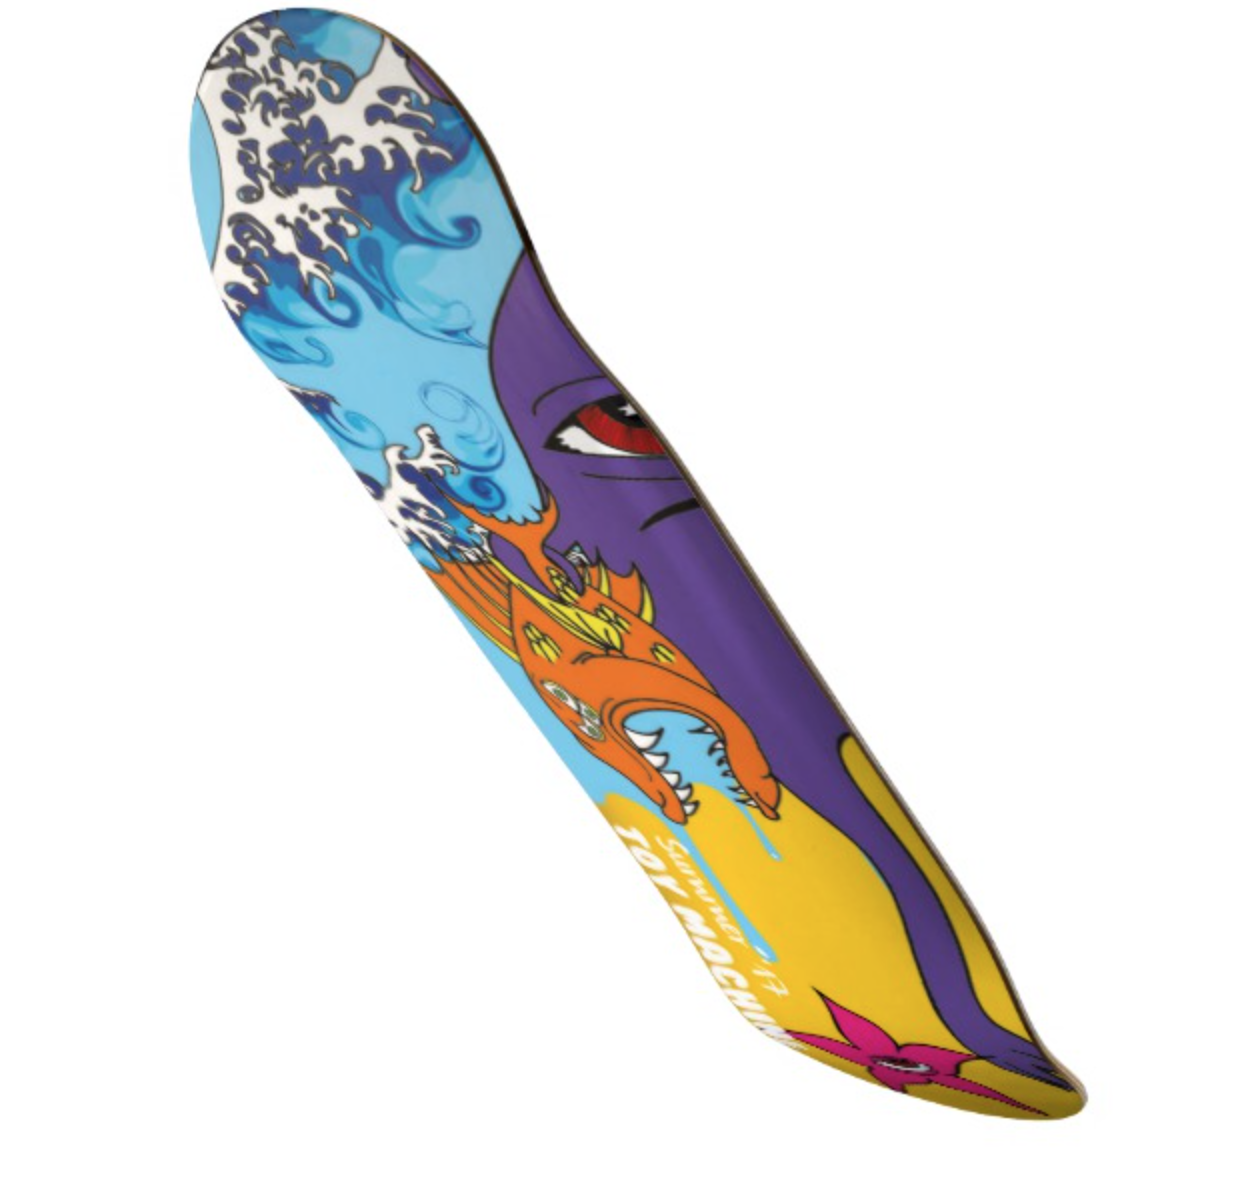
Here are the final designs.
Overall I am happy with the final outcomes for the 2 deck summer series. I feel it fits the brief in everyday and is appropriate for the brand of toy machine.